Hard drives with physical damage require a complex imaging approach. This guide will explain how to retrieve data with the minimal risk of data loss on a drive with a damaged head stack.
If an Automatic Checkup report indicates that there is a problem with the heads, look at the status of each head.
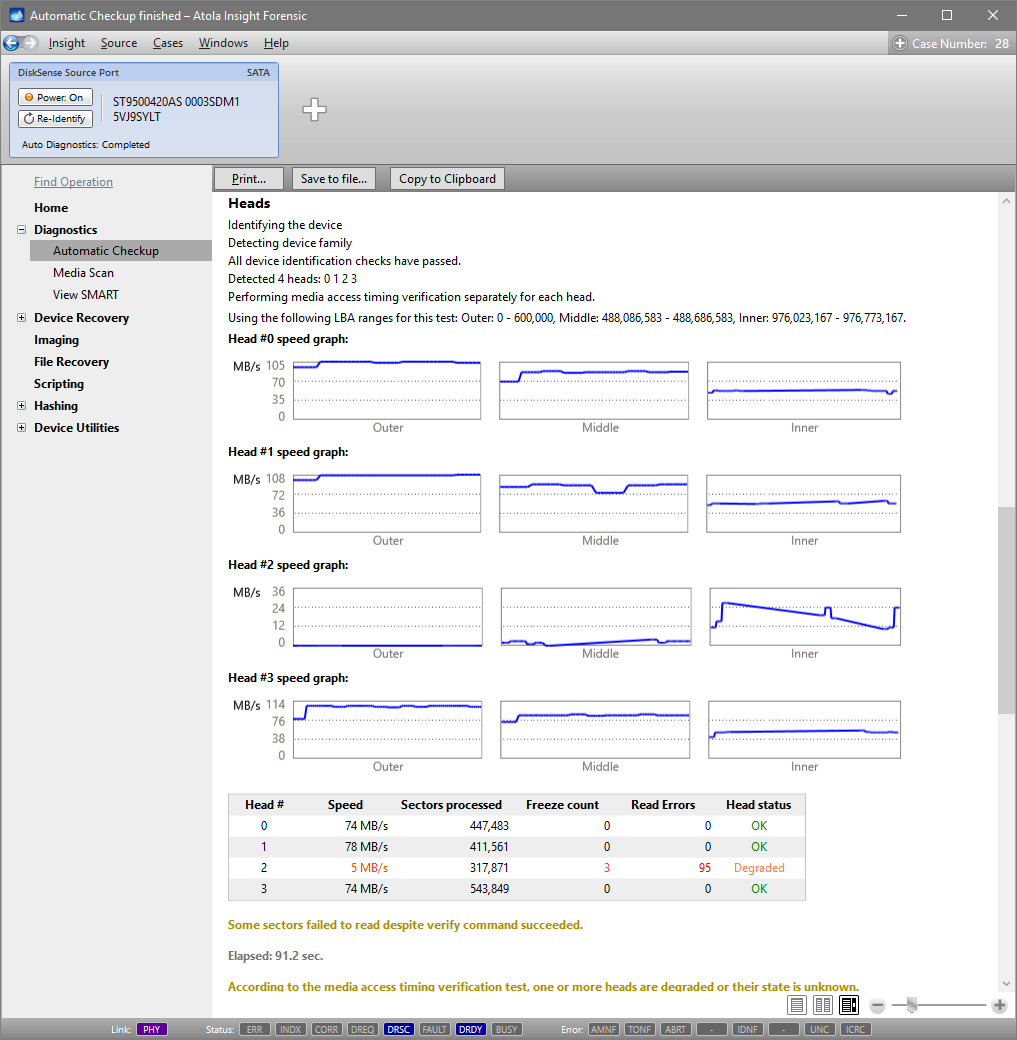
If the status of a head or multiple heads is Degraded or Damaged, the drive will not be able to read all the data. What’s worse, even more sectors may soon become unavailable due to incorrect functioning of the drive’s hardware.
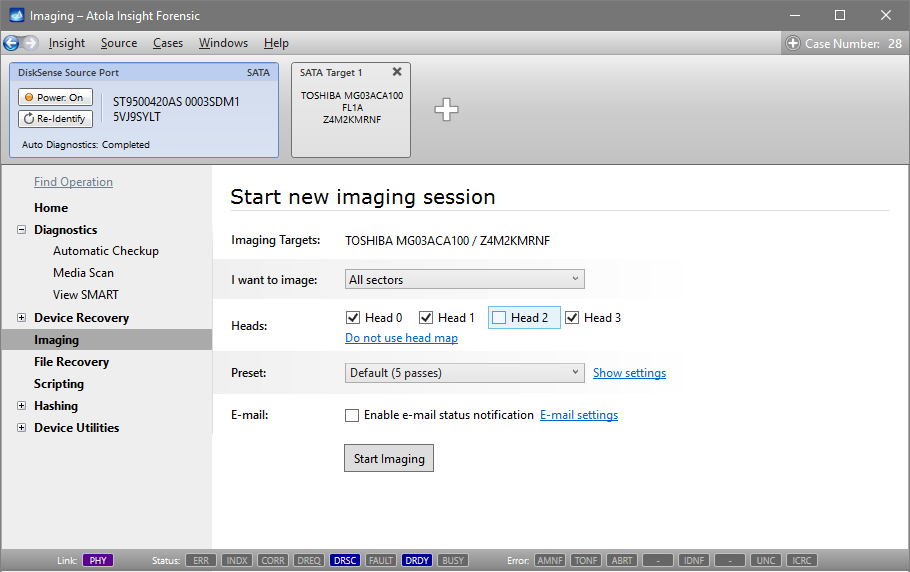
We recommend that you start by imaging the heads, whose status is OK, as soon as possible. To do that:
Step 1. Go to Imaging category of the left-side menu, click on Create New Session link and select the device or file to which the data will be imaged.
Step 2. In the Start new imaging session page go to Heads line and click on Select heads to use link.
Step 3. Unselect the damaged head.
Step 4. Click on Start Imaging button.
As a result, you get as much data from the drive’s viable heads as possible before even beginning to work with the damaged head. This way the risk of losing data on the working part of the head stack is minimized.
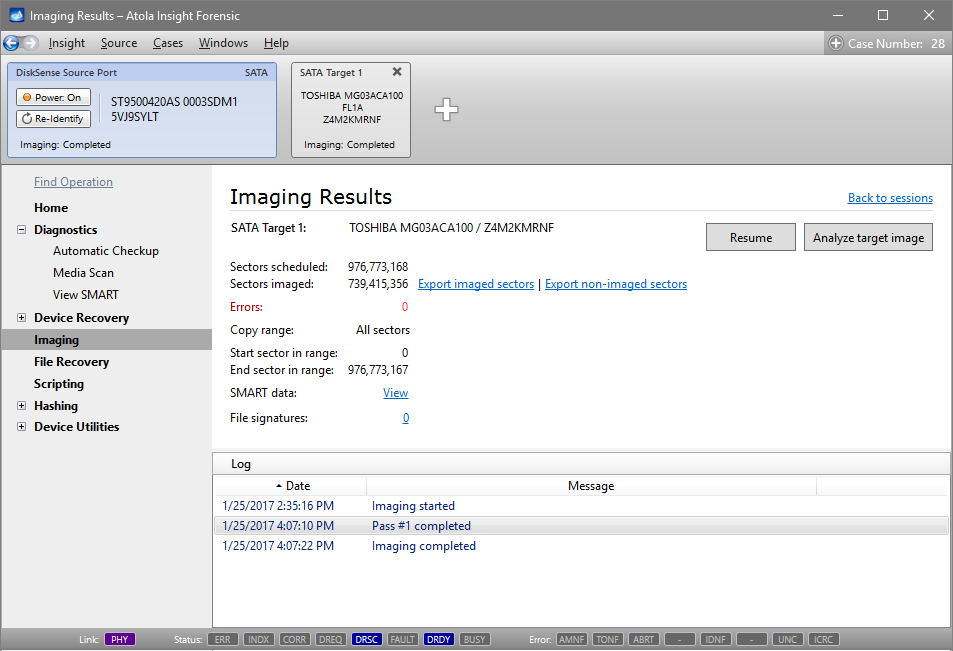
Now that this data has been successfully retrieved, you have two options:
- To have the head stack replaced before imaging the remaining data. However, as a result of head stack replacement data on the drive can become unreadable.
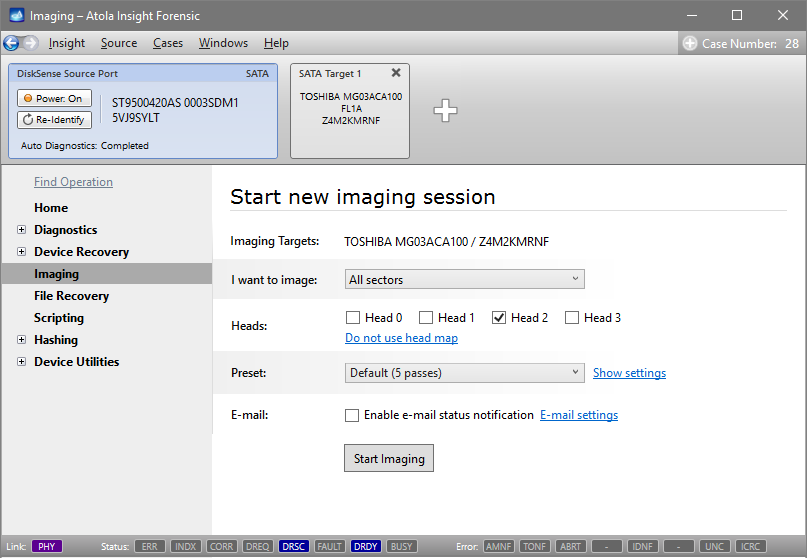
- To attempt Imaging data with the Degraded or Damaged head. Follow the same procedure as with the good heads, only this time, during Step 3 unselect all the working heads and leave only the Degraded/Damaged one(s) before clicking on Start Imaging.
Atola Insight Forensic’s sophisticated functionality enables users to retrieve maximum data even from the severely damaged drives.

Now that you have an image of the source evidence including the data copied from the damaged head, you can take the risk and get the head stack fixed. Afterwards, you can start a new session to complete the initially created image with data from previously unreadable sectors.
The post Imaging Drives with Damaged Heads appeared first on Official Atola Technology Blog.


