TaskForce system allows expanding its compatibility with other device interfaces via hardware extension modules.
How to plug an extension module
TaskForce system must be powered off before an extension module can be plugged:
- Power off TaskForce
- Plug extension module into the Extension port
- Power on TaskForce
Thunderbolt extension module
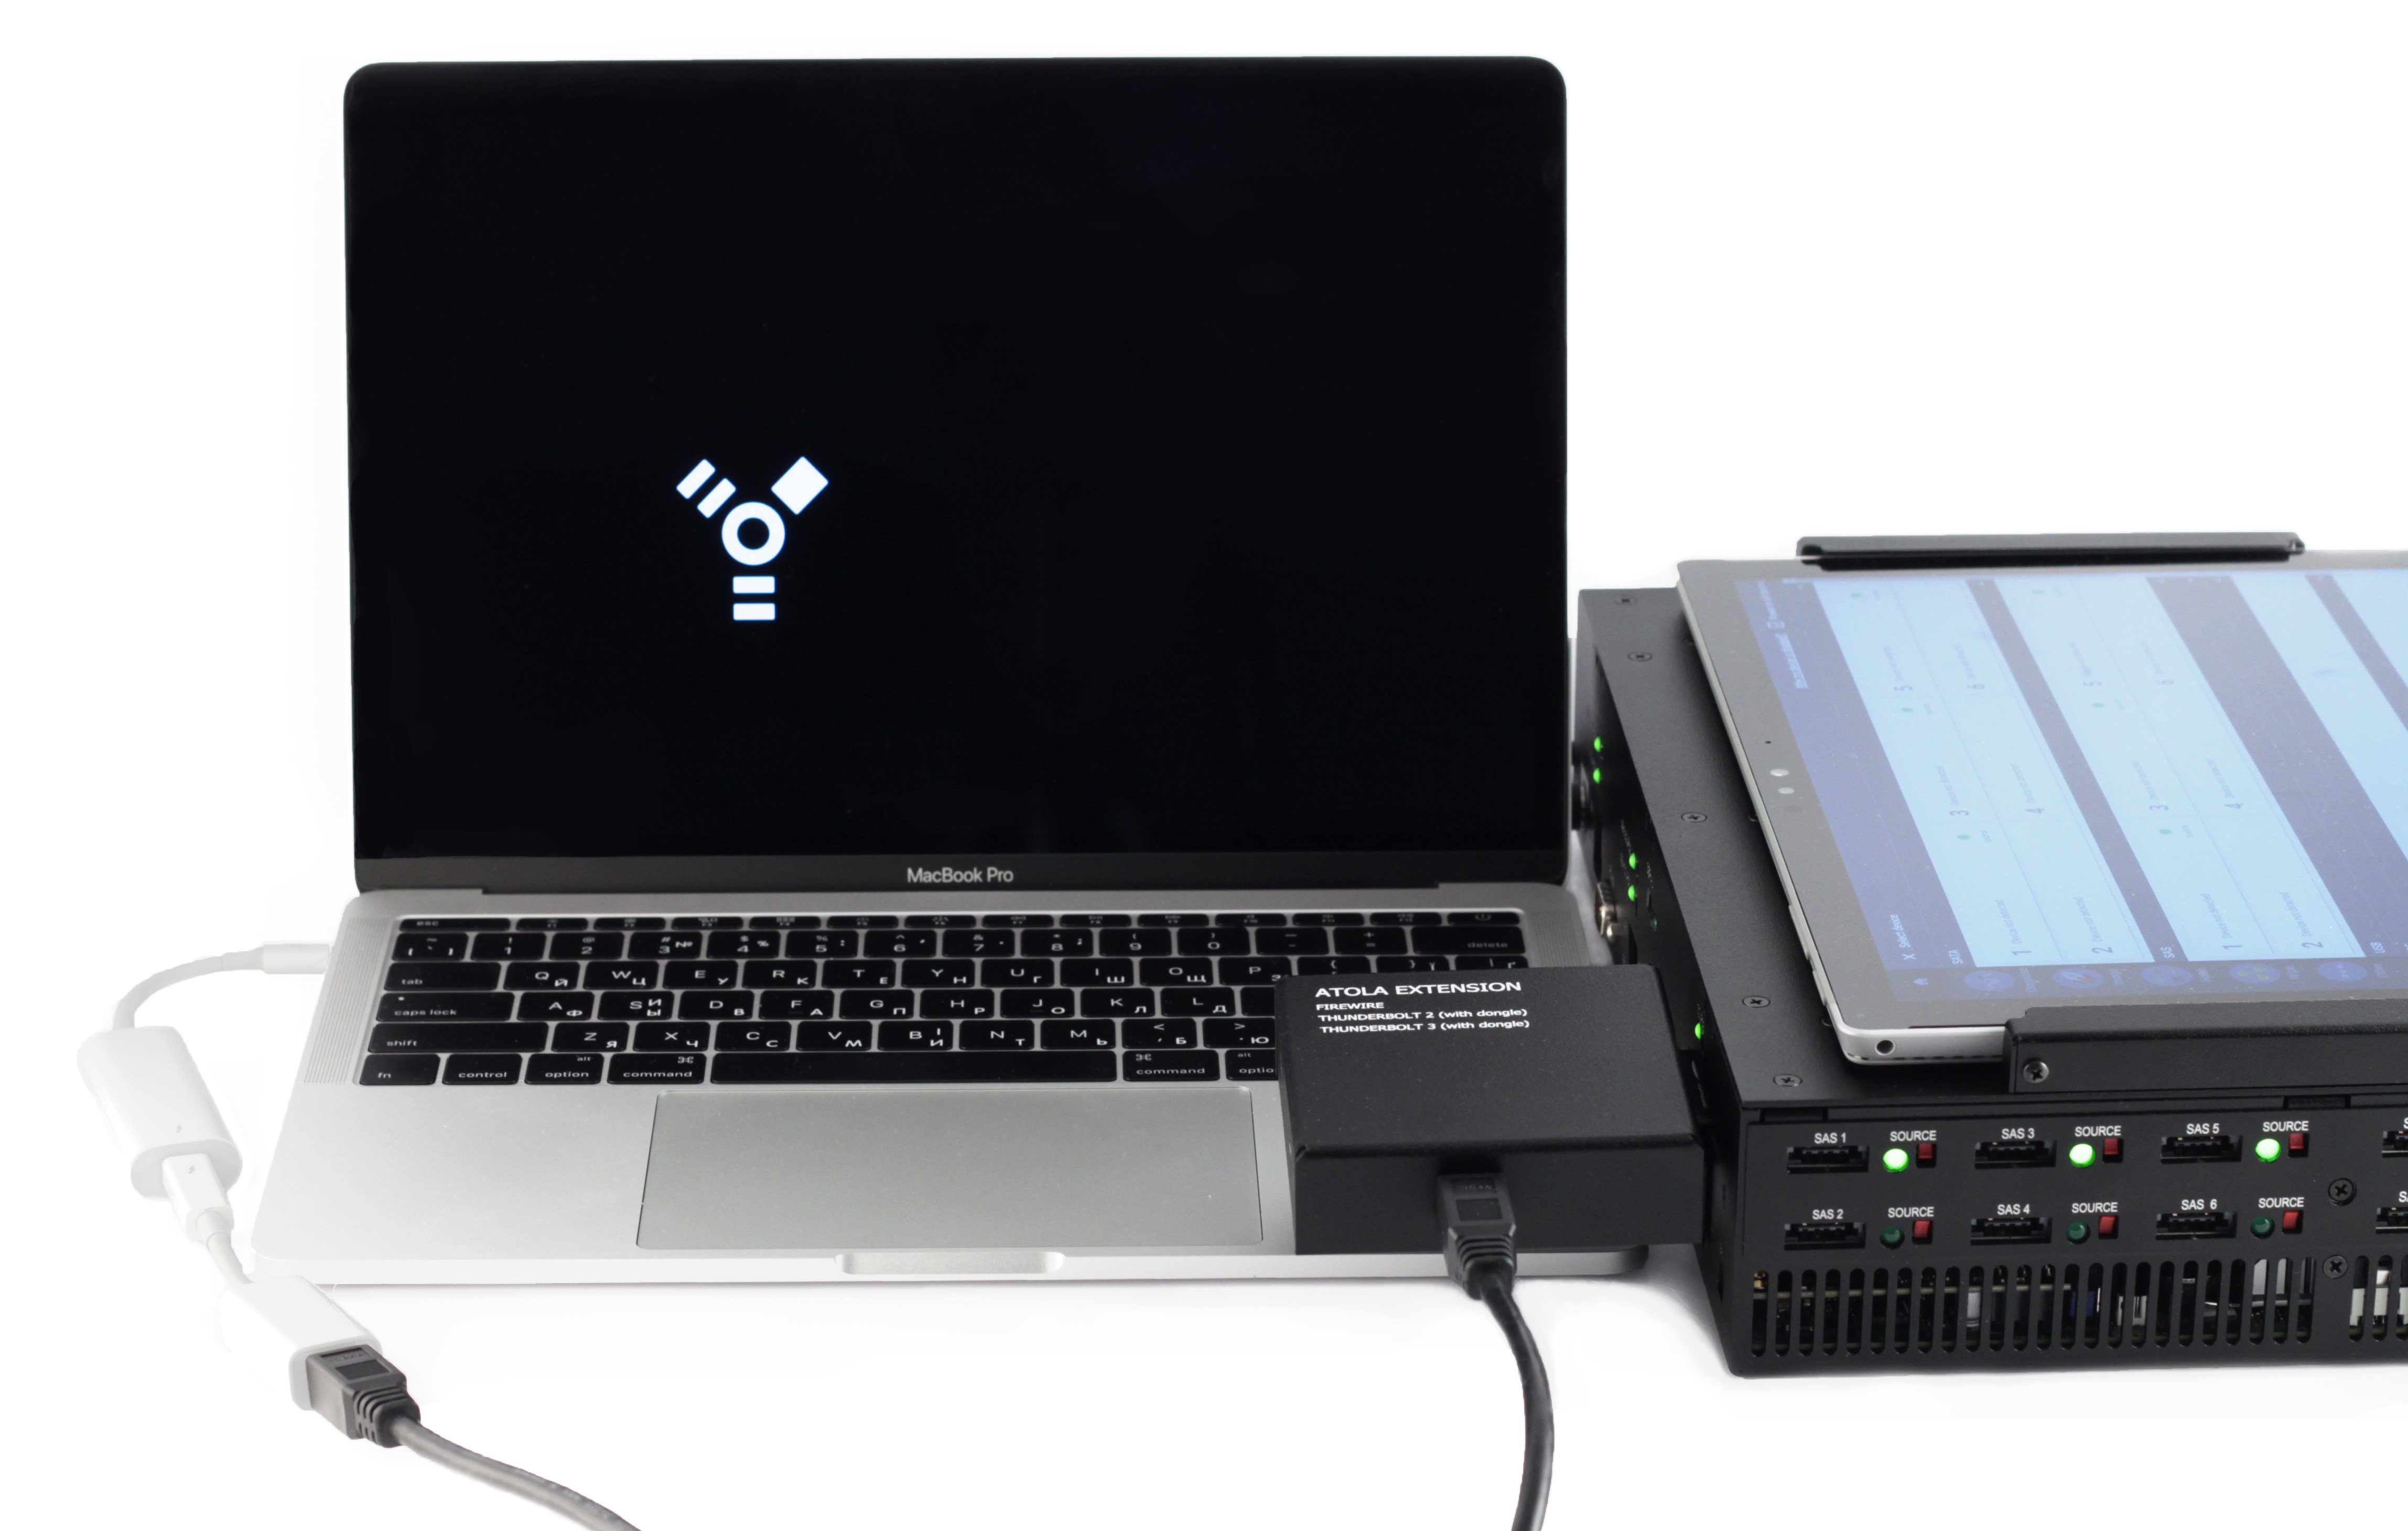
With the help of Thunderbolt extension module TaskForce supports imaging, hash calculation, write protection on all MacBooks with FireWire, Thunderbolt 2 and Thunderbolt 3 interfaces.
Thunderbolt extension
Connecting MacBook via Thunderbolt extension module
- Connect MacBook to TaskForce unit with the help of Thunderbolt extension and the FireWire cable. Use adapters if needed (included).
- To boot MacBook in Target Disk Mode, start it up while holding down the T key until you see a Firewire or Thunderbolt icon displayed on screen signifying Target Disk Mode.
- Power on TaskForce and wait for the booting to be completed.
- Open Device menu.
- Click the port in Extension section of the Device menu.
- In the Enter MacBook serial pop-up window, enter the serial number located on the bottom side of the MacBook and click OK.
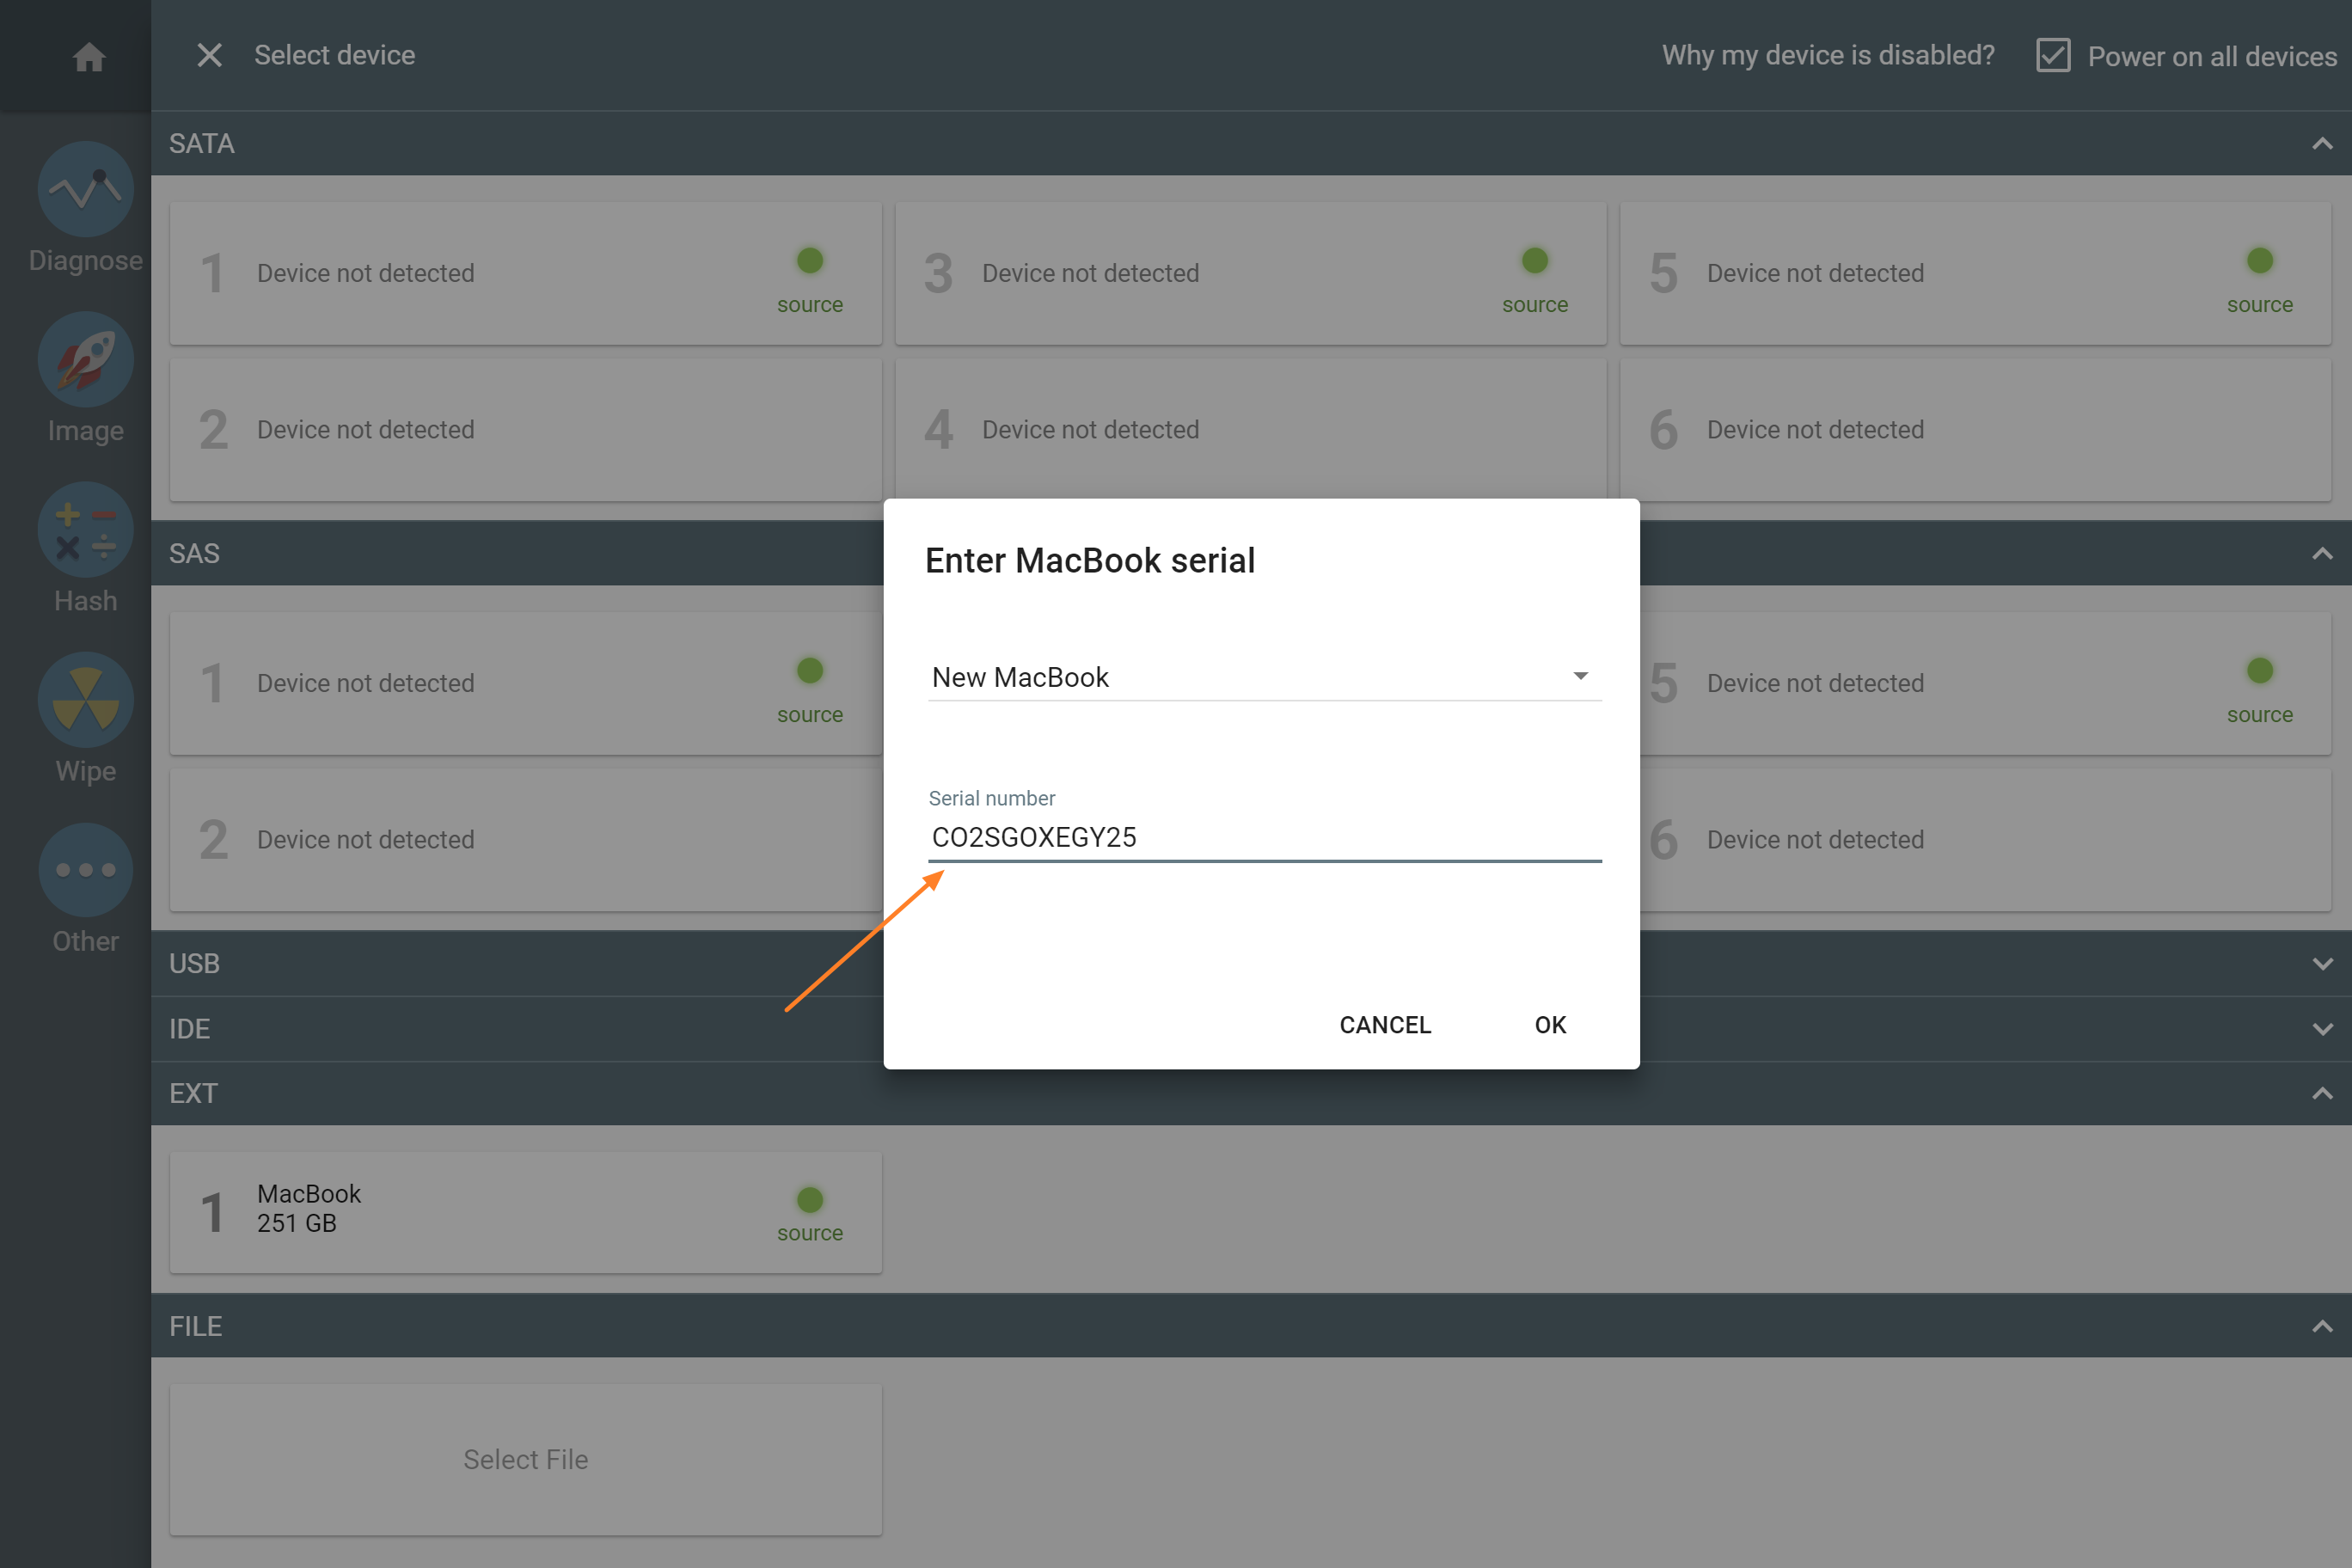
Enter MacBook serial number
Apple PCIe SSD extension module
This module supports custom proprietary PCIe SSDs from Apple MacBooks (Mid 2013 – 2015).
Important: Drive hotplug is not supported yet. TaskForce must be powered off before installing or replacing drives.
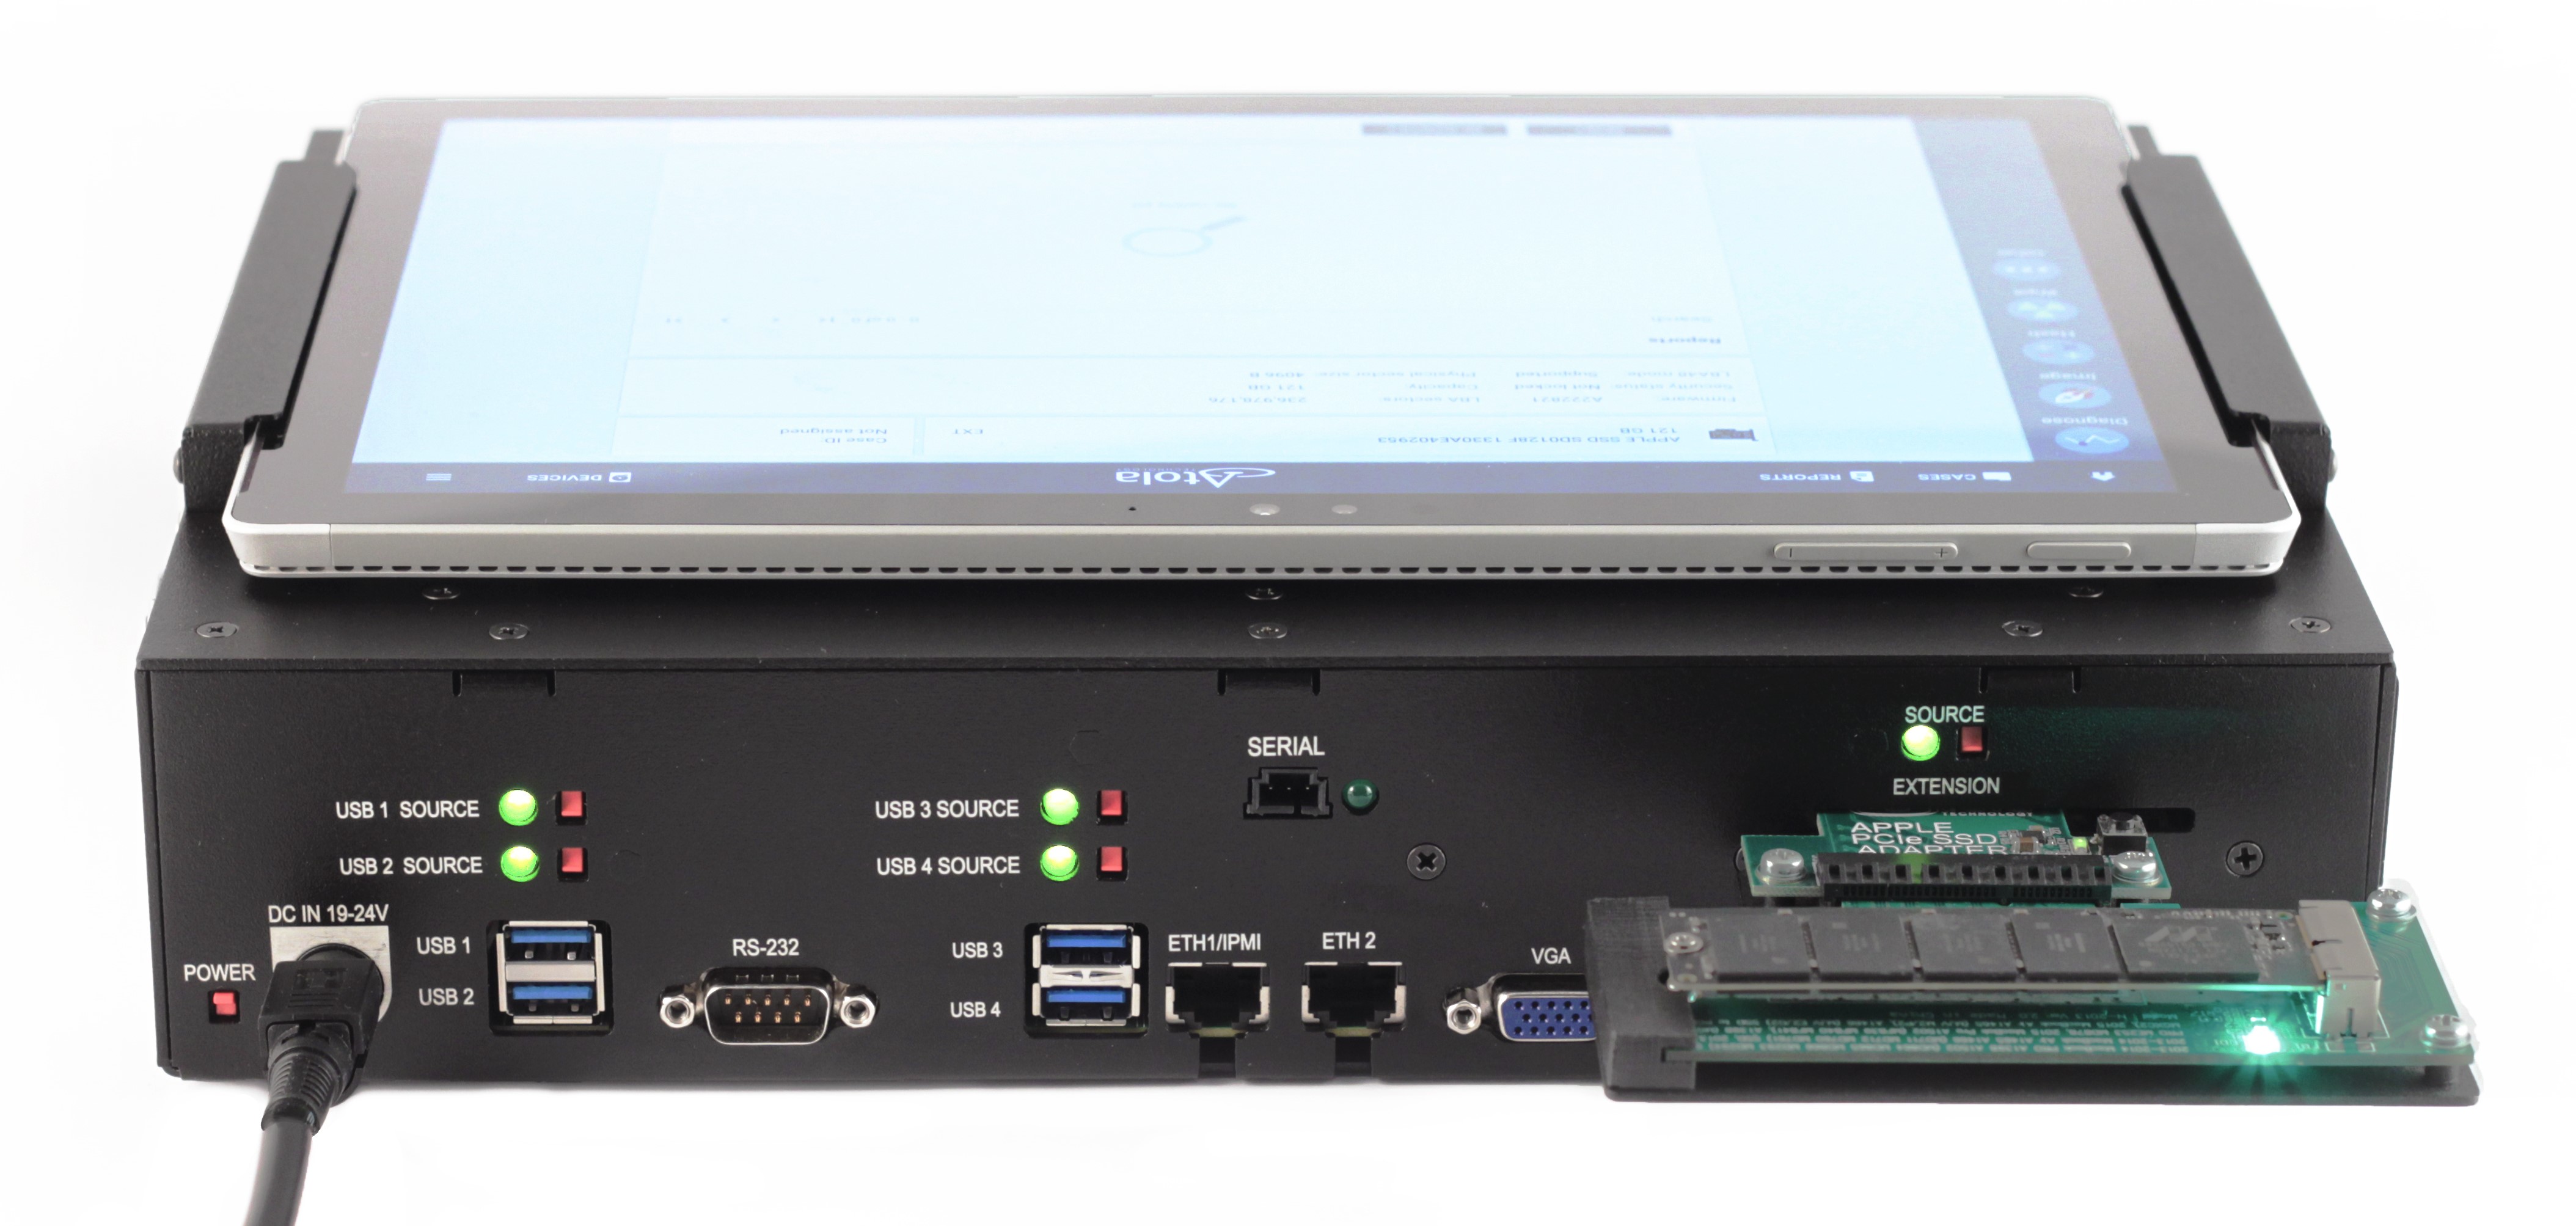
Apple PCIe SSD extension
M.2 SSD extension module
Only M key interface drives are supported by this module. Differences between M.2 MVMe, M.2 SATA and M.2 PCIe support:
| Features | M.2 NVMe | M.2 SATA | M.2 PCIe |
|---|---|---|---|
| All TaskForce operations | Partial | Yes | Partial |
| Drive hotplug | No | Yes | No |
| Power management | No | Yes | No |
M.2 SSD features supported:
- Max read/write speed: 1300MB/s
- Damaged drive support
- Calculate hash
- Write protection
Connecting an M.2 NVMe or M.2 PCIe drive via extension module
Important: Drive hotplug is not supported yet. TaskForce must be powered off before installing or replacing drives.
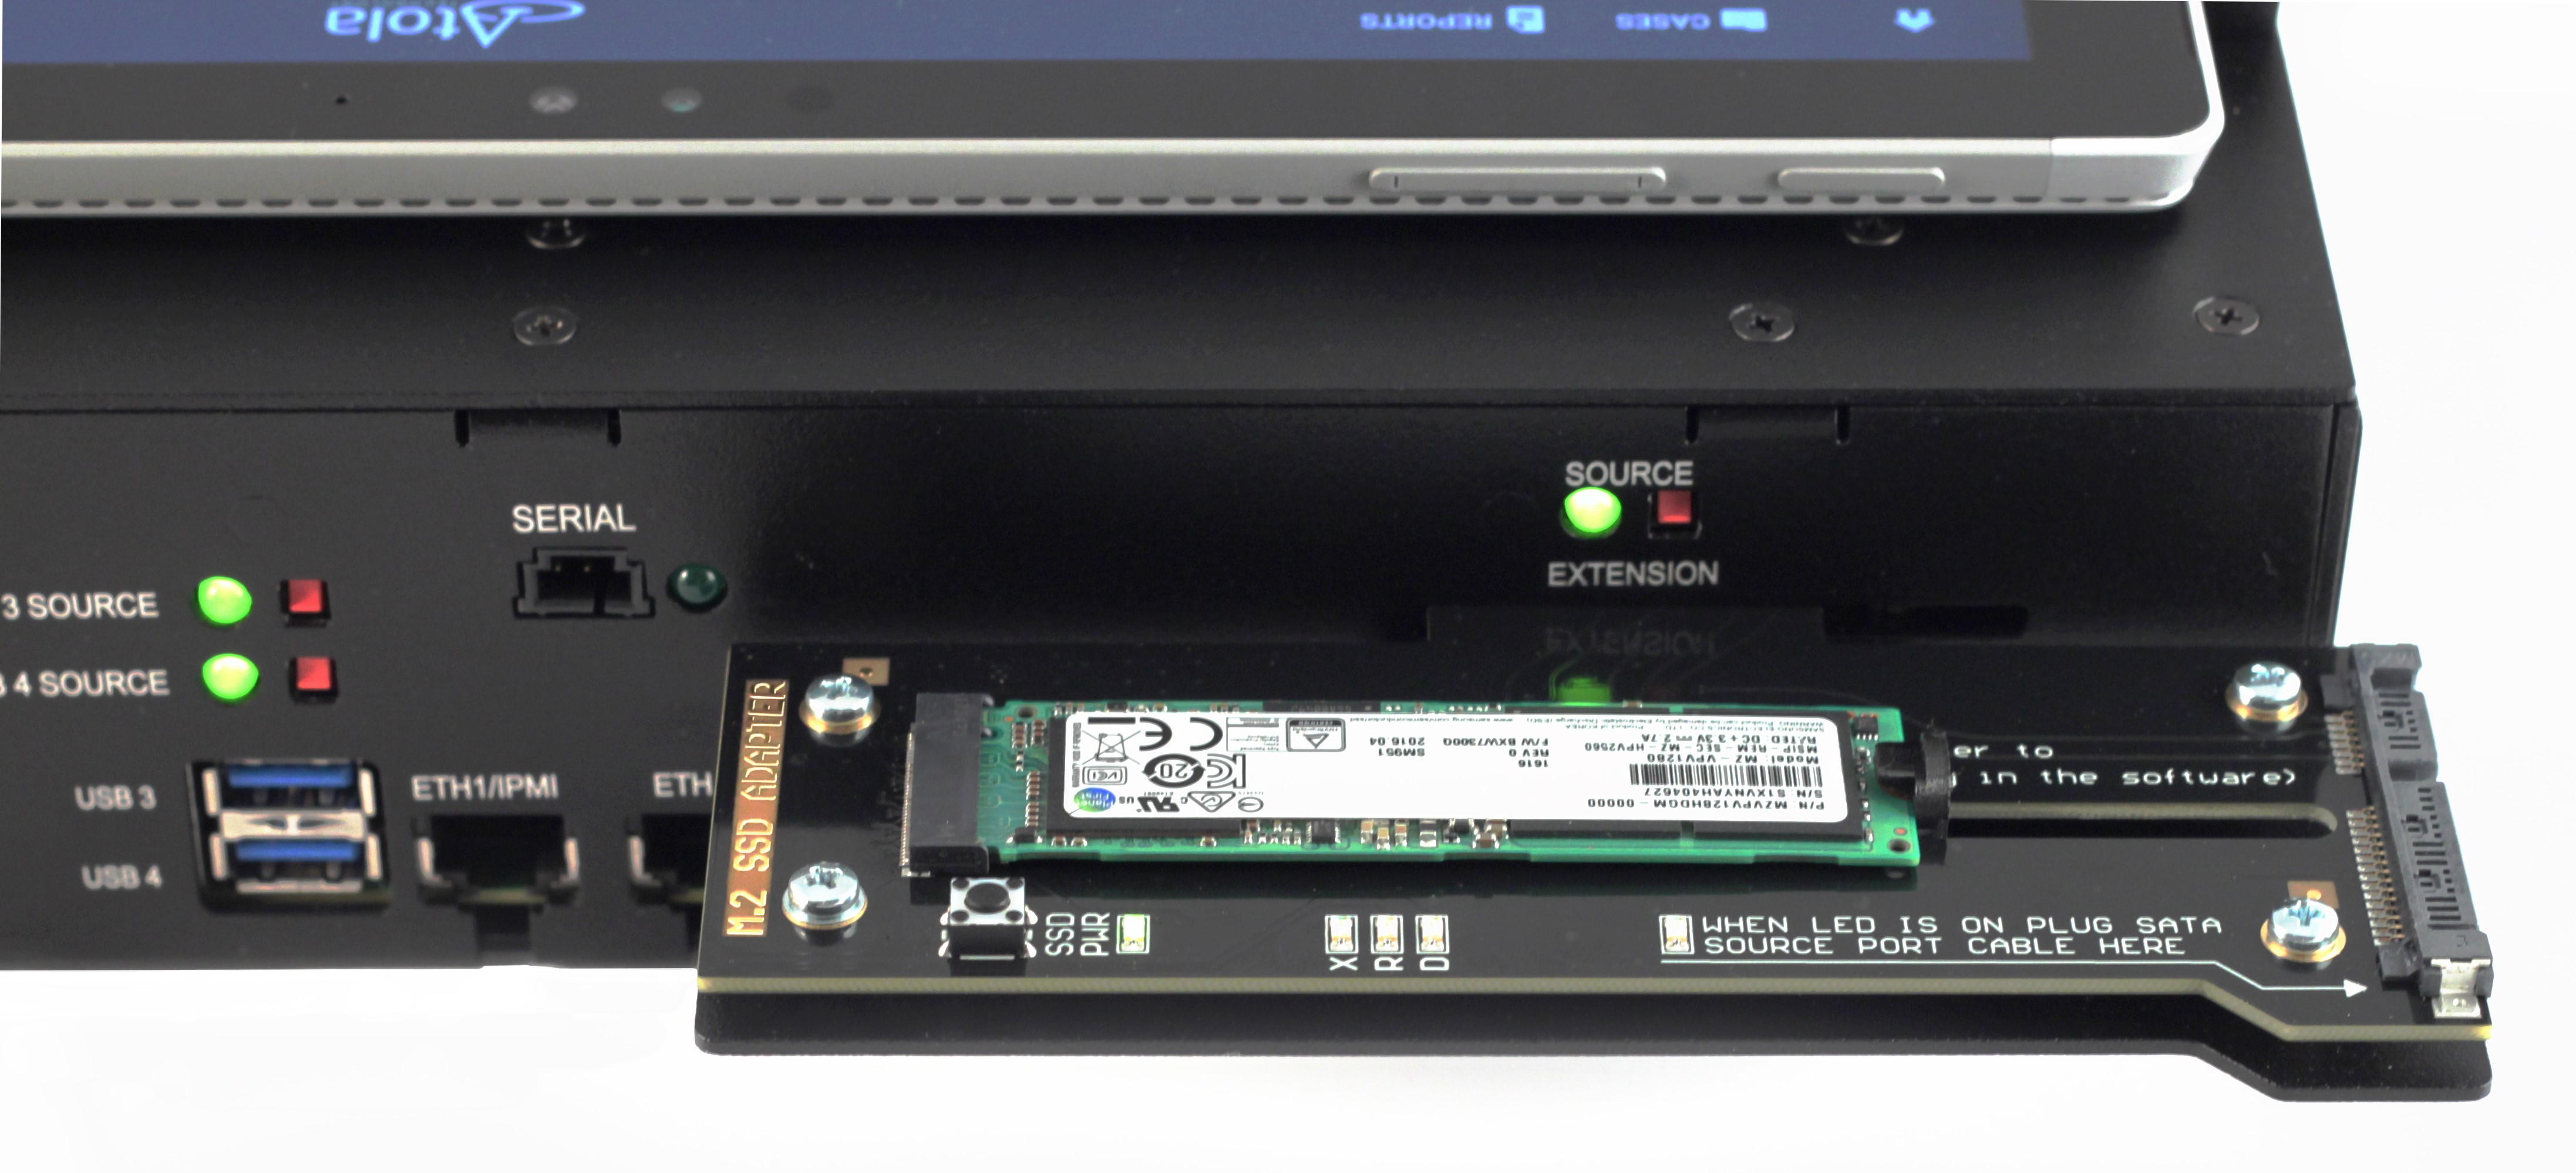
M.2 PCIe SSD extension
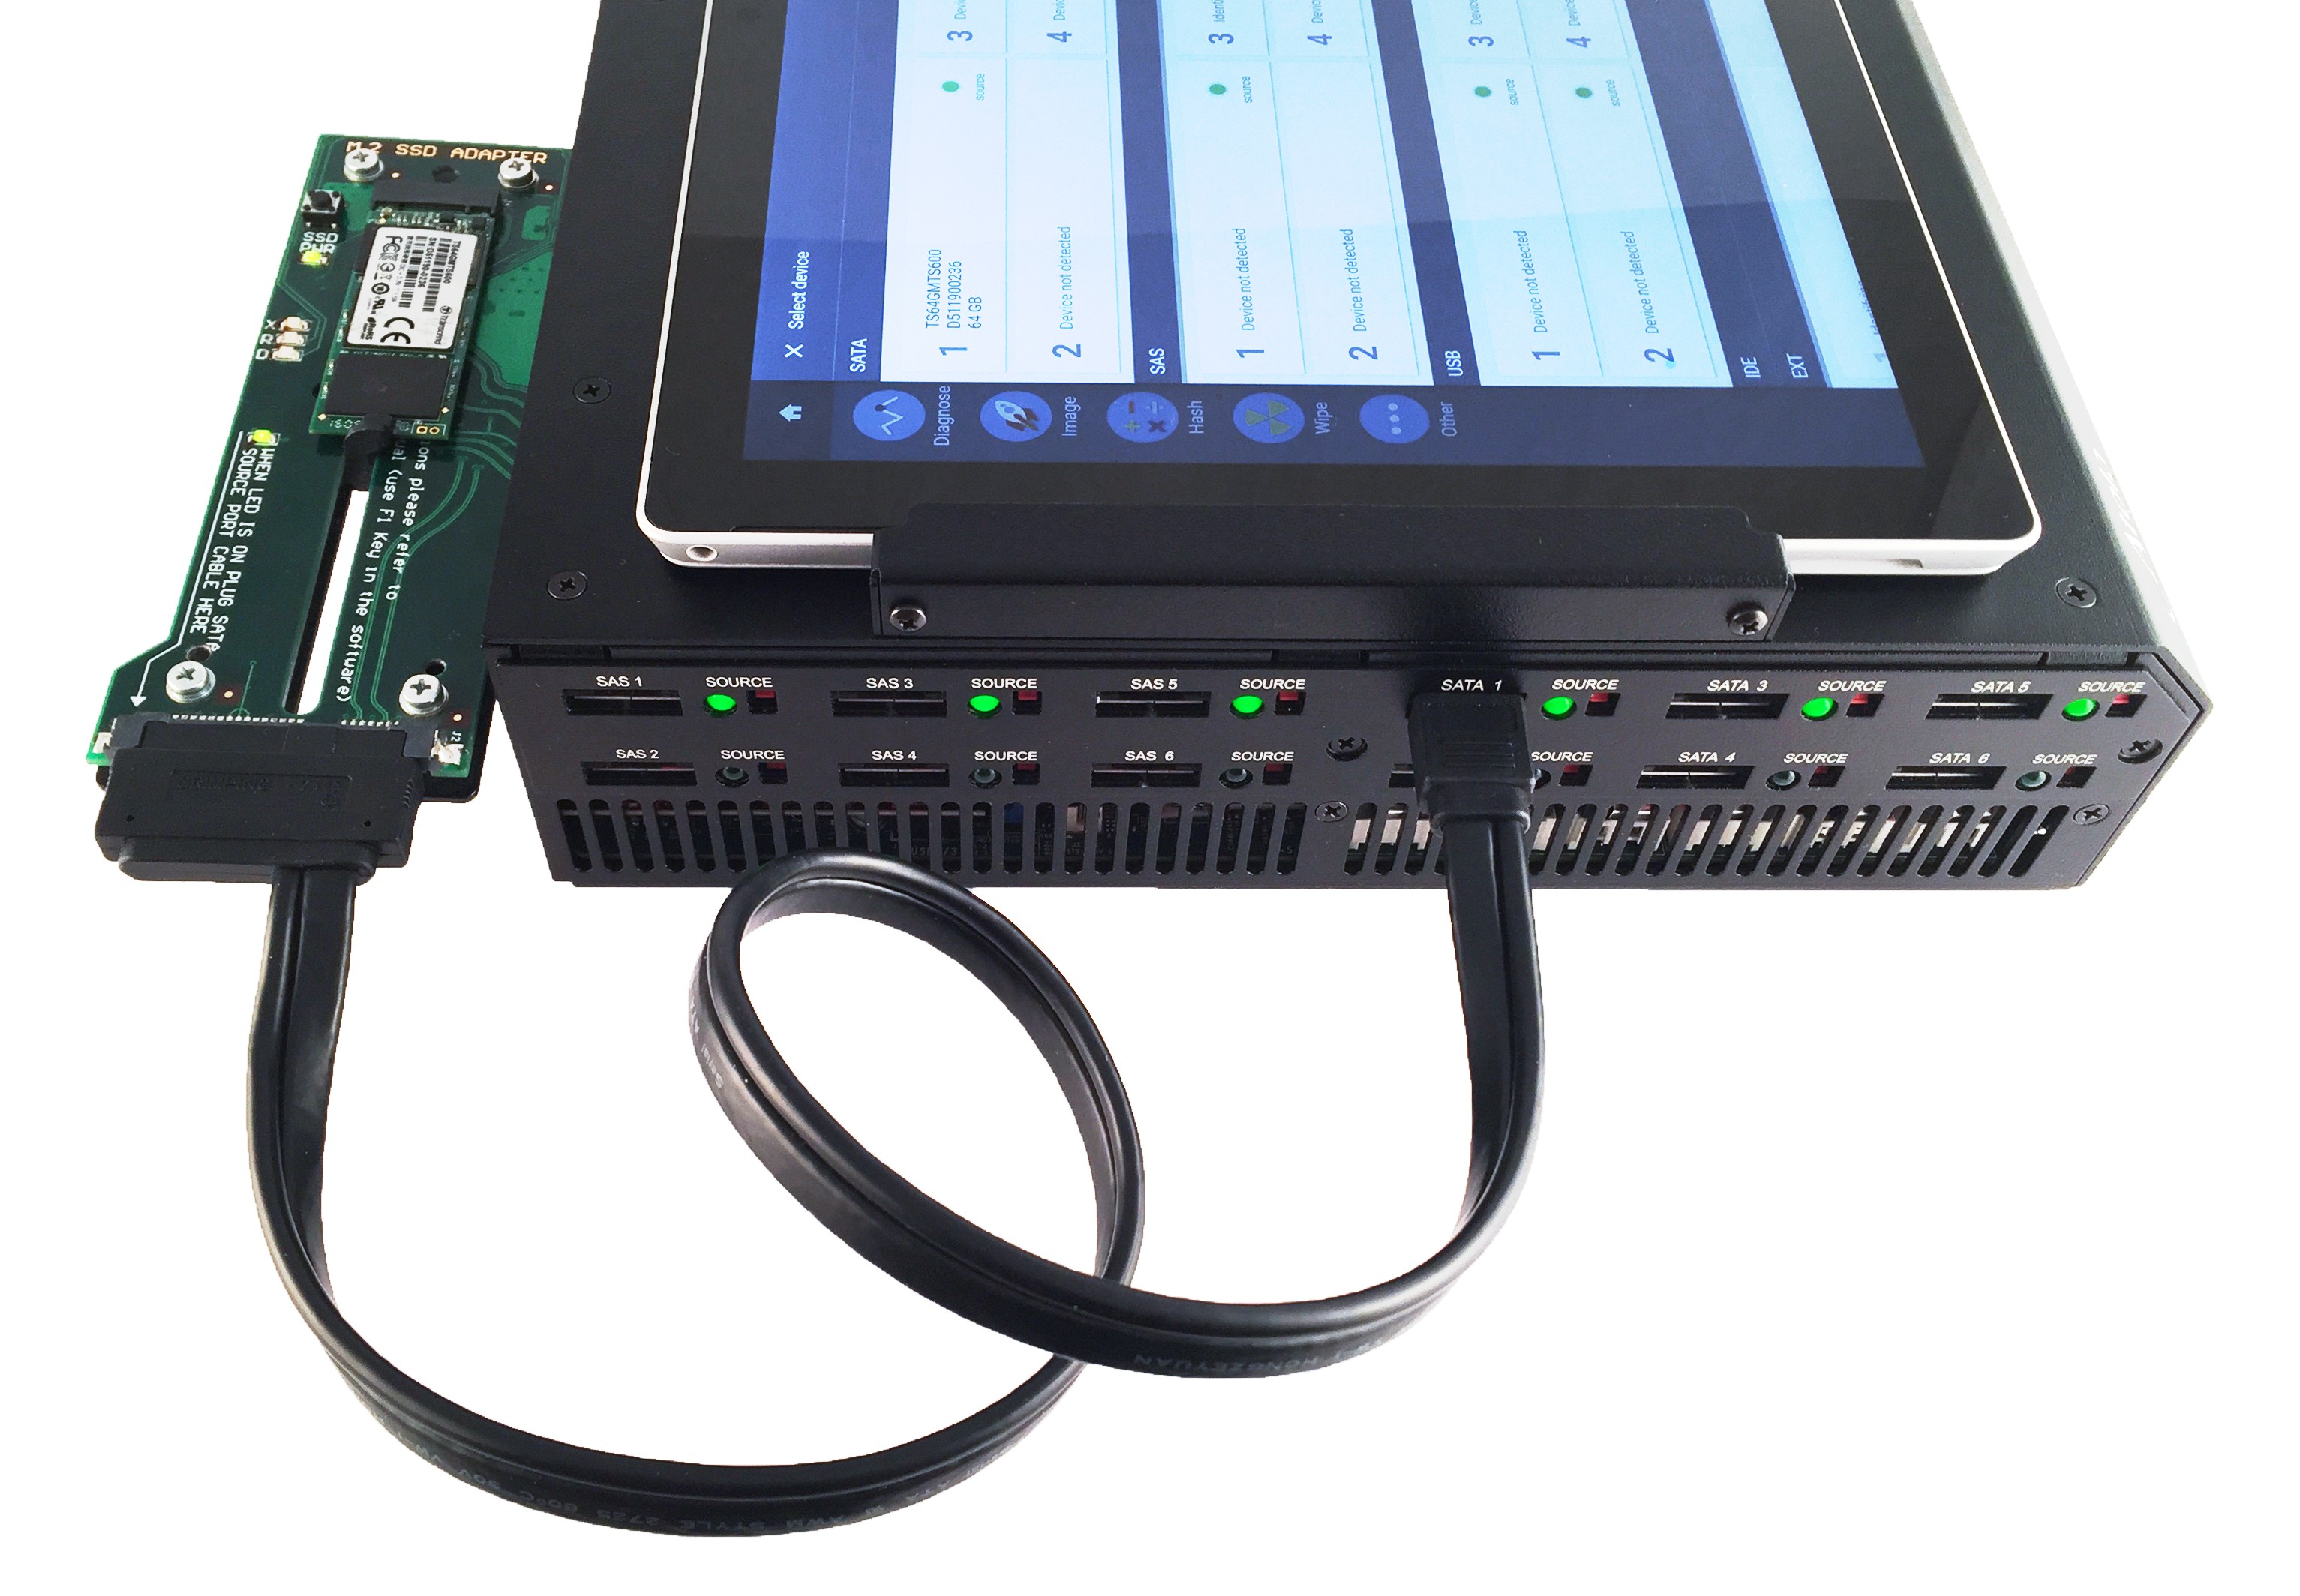
Connecting an M.2 SATA drive via extension module
- Connect the eSATAp cable end to the extension
- Power off SATA or SAS port in Atola TaskForce software
- Plug M.2 SATA drive into the extension and fix it in place with the plastic latch
- Power on SATA or SAS port in Atola TaskForce software
For M.2 SATA, drive hotplug is supported. It allows installing and replacing drives by powering off the extension port in Atola TaskForce software.
M.2 SATA SSD extension
The post Using extension modules with TaskForce appeared first on Atola Blog.